
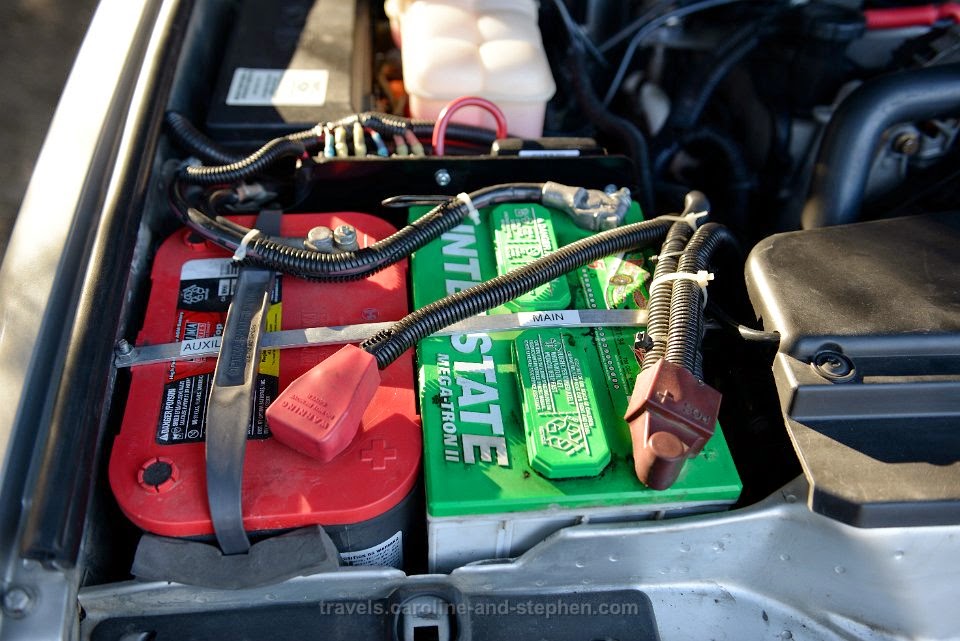
Sterlin now has two batteries, one battery for the engine and a new one for auxiliaries. The auxiliary battery is installed in the engine bay next to the main battery. The two batteries are electrically connected via a charging solenoid. The auxiliary battery power is used for: the fridge, clean water pump, spot lights at the front of the car, outlets installed on roof rack for extra lighting and various other things, like chargers.Should you want to know more, this post provides a lengthy description of the installation.
Dual Battery Mechanical Installation
The first step was to disconnect and remove the engine battery and then to unbolt and remove the original plastic battery tray. The replacement battery tray is a custom Land Rover Discovery II dual battery tray from Columbia Overland which uses the existing mounting points and was a quick and easy installation. With the new tray in location, it was much easier to plan the location for all of the extra bits and pieces of electrical equipment which are mounted on the side of the new tray.
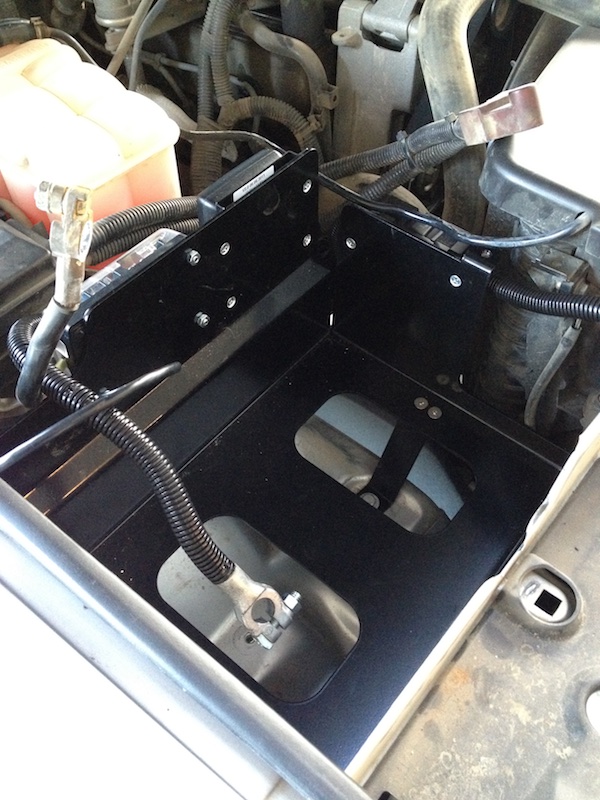
Mounted to the side of the battery tray is a 100 Amp Fuse in a Fuse Holder, the National Luna Intelligent Charging Solenoid and Isolator, a Blue Sea 12v DC Distribution panel and two relays to isolate some of the circuits. The good news, everything fits, although it is a tight fit.
Battery Selection
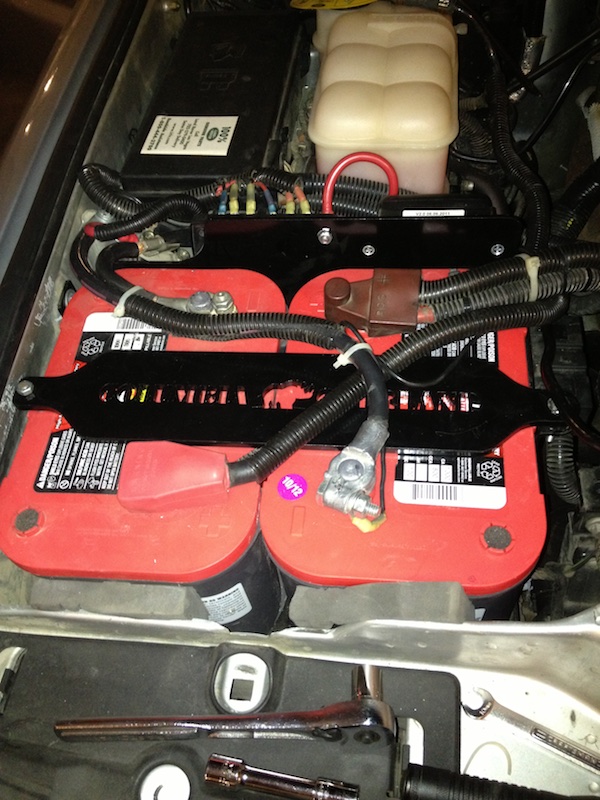
Started off with two Optima Red Top batteries. In hindsight, this was not a good choice. And one of the Red Tops failed less than 1 year into service. It was replaced with a Yellow Top. So the final configuration was Red Top for engine battery and Yellow Top for the auxiliaries.
Dual Battery Electrical Installation
Electrically the connection between the main battery and the auxiliary battery is very simple. The charging solenoid is typically open. The charging solenoid is able to detect the voltage drop on the main battery when the engine is started and after a five minute timer the charging solenoid closes. This allows the main and auxiliary to both be charged off the alternator. Once the engine is stopped and the alternator stops providing a charge, the charging solenoid can detect this condition and opens the charging solenoid. The 12v distribution circuits are permanently connected to the auxiliary battery to ensure these circuits are not interrupted, even during an engine start.
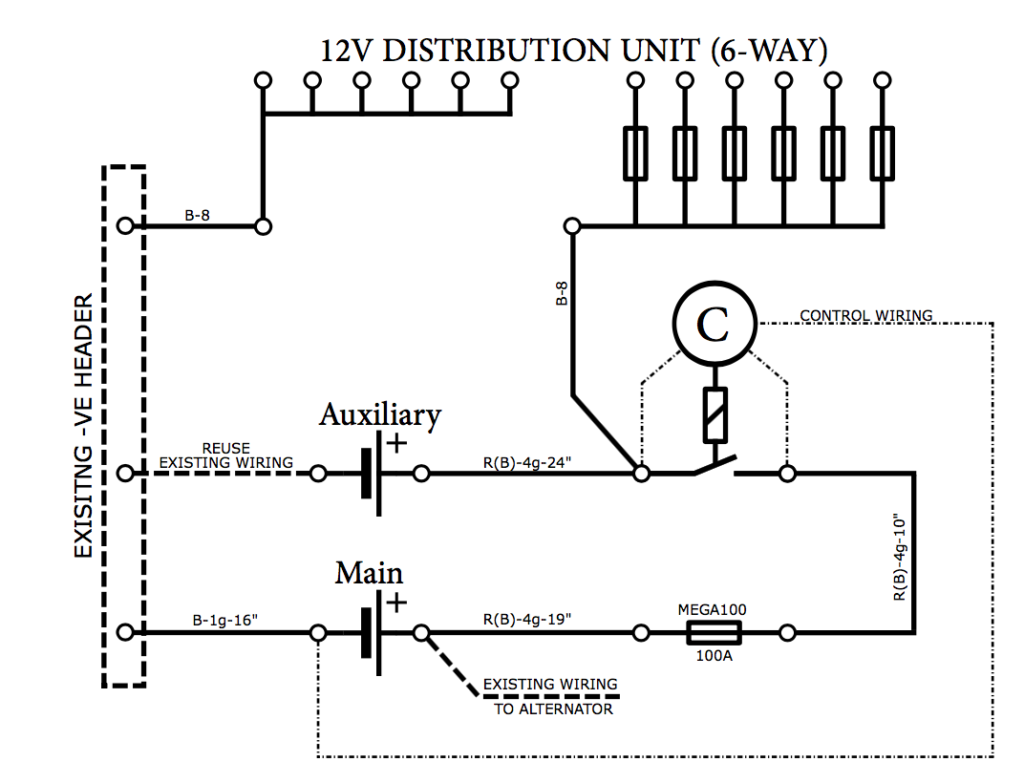
Once the second battery, new battery cables and charging solenoid were fitted, the real work of installing the distribution wiring was undertaken. This was made easier by using the Blue Sea 6-way Distribution Board with integrated fuse holders.
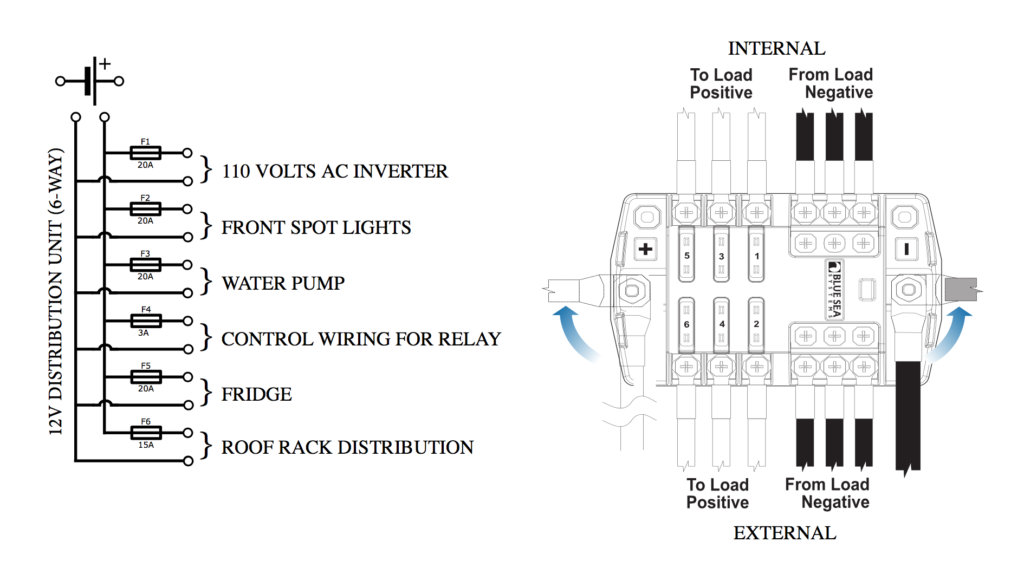
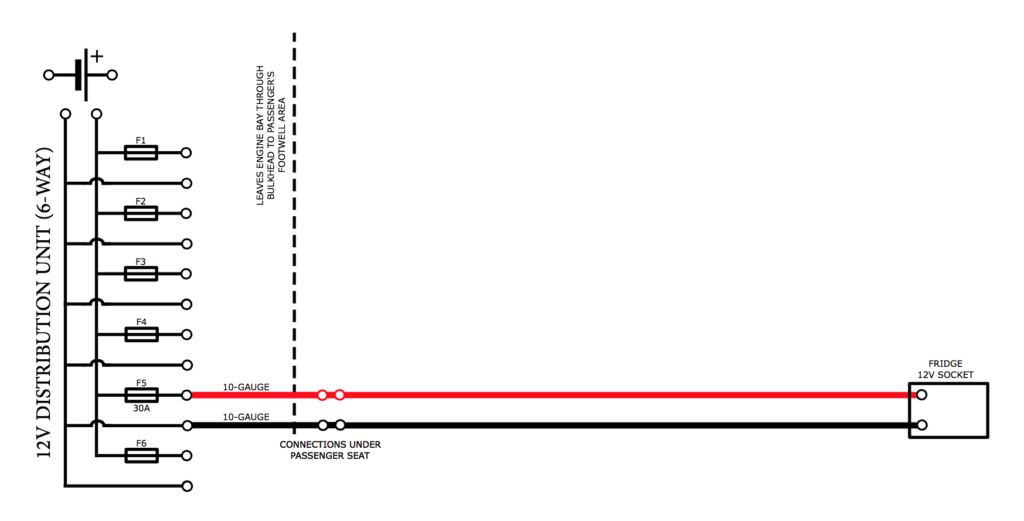
Fridge Wiring
The ARB Fridge works directly off 12 volts with a dedicated circuit. The wiring leaves the engine bay through the bulkhead into the area behind the glove-box and then under the passenger seat to the rear left side trim where a 12volt socket is mounted for a clean finish. The fridge circuit is purposely simple to reduce voltage drops and increase reliability.
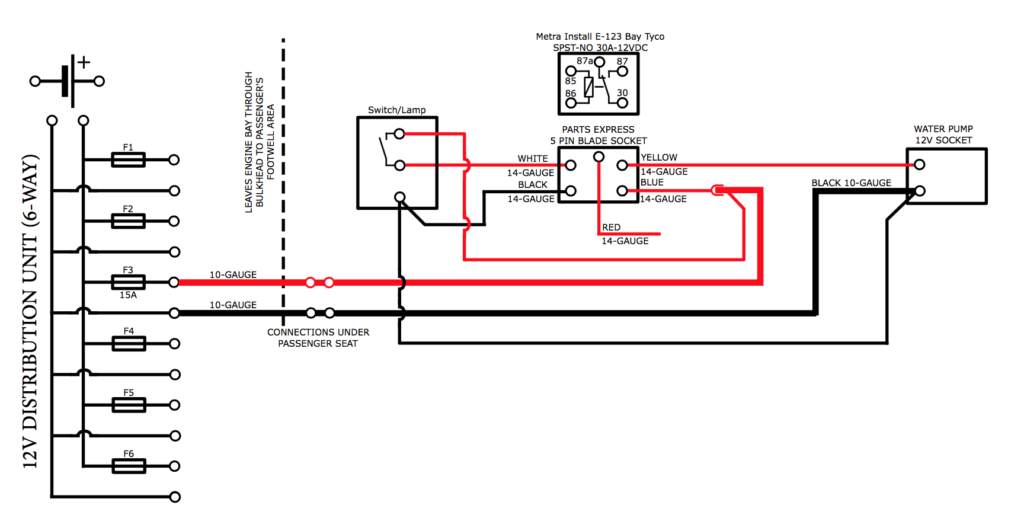
Water Pump Wiring
The SHURFlo pump also works directly off its own 12 volt dedicated circuit. Like the fridge, the wiring leaves the engine bay, through the bulkhead, under the passengers seat to the rear left trim. Unlike the fridge which is continuously connected, the water pump has an isolation switch controlling an isolation relay. To avoid the pump cycling on and off, a switch was added so that the pump can be turned off during driving and over-night. The switch and 12volt socket are mounted on the trim.
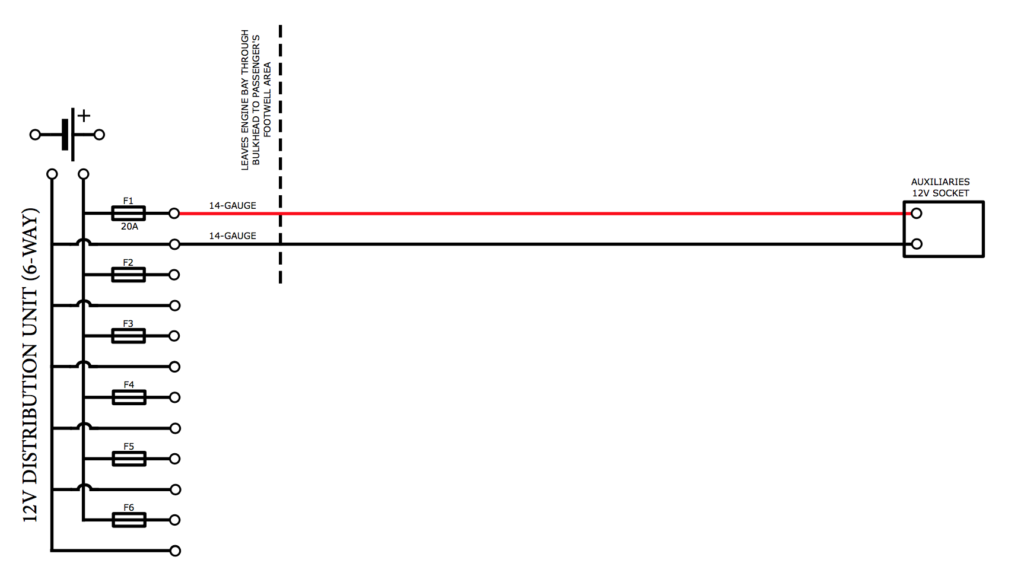
Auxiliaries and 110 volts AC
There is a 12 volt dedicated circuit wired to a 110 volt inverter mounted under the passenger seat. The inverter is for charging the laptop computer, camera batteries, sat phone and other electronics.
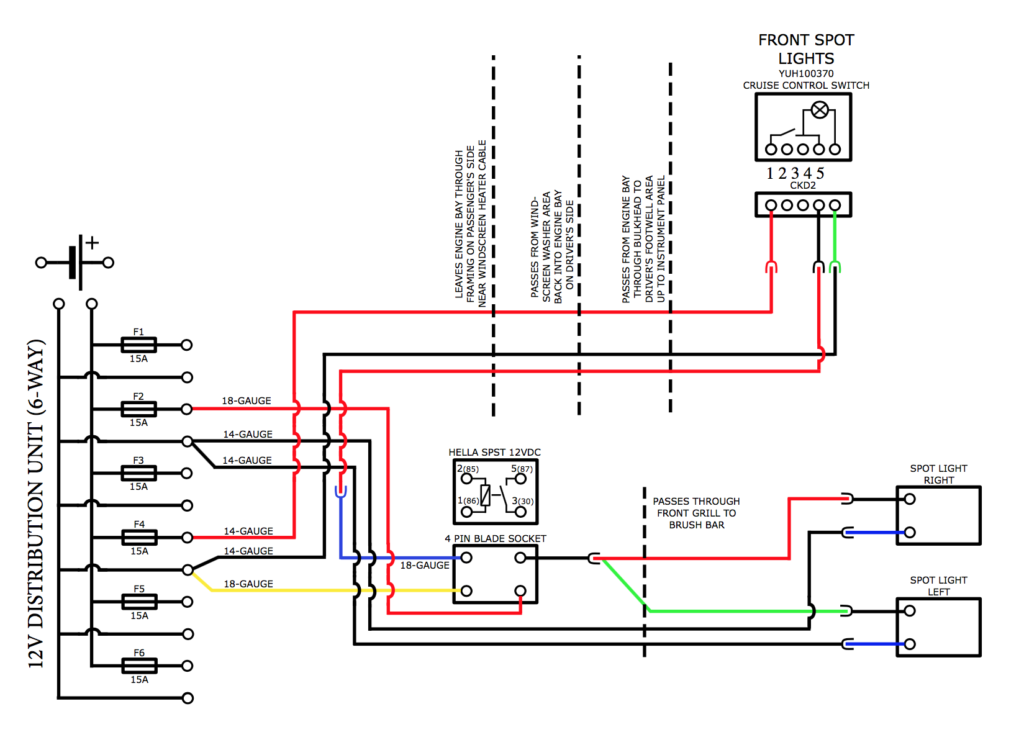
Front Spot Lights
There is a 12 volt dedicated circuit for the spot lights mounted on the front brush bar. The spot light wiring is switched via a relay controlled by a latching switch mounted on the instrument panel to make it easy to turn on and off. It was quite a job to get the control wiring from the engine bay into the drivers side instrument panel and switch banks behind the steering wheel. A latching switch was used to make the control wiring simpler.
PS: My brother Hamish was here the weekend these lights got installed and it was valuable to be able to tap his knowledge about cars.
Roof Rack Distribution
Lastly, there is a 12 volt dedicated circuit for all of the external wiring on the roof rack, including tent lighting, awning and annex lighting and 12 volt sockets located at the rear of the roof rack. Like the spot lights which are external, the power to the roof rack can be switched off from the instrument panel. Again a latching switch and isolation relay are involved in the circuit.
